Pages

Tuesday, March 19, 2013

Tim Holtz Challange


I've been out of the crafting loop for a while. I moved from Ft Hood Texas to Ft Huachuca Arizona over Christmas break. So needless to say I've been busy setting up house and all that fun stuff! During our move my mom gave me a large tote of old pictures she inherited from her mother when she passed away years ago so I spent 3 weeks or so scanning old pictures and negatives with a new scanner my husband bought me for Christmas. So the last couple weeks I've been making paper and fabric flowers for an album I want to make my mom with all these old photos that she gave me. When I came across the challenge that Tim Holtz was holding I decided to put together something that I have been wanting to try anyway and submit it for the challenge.

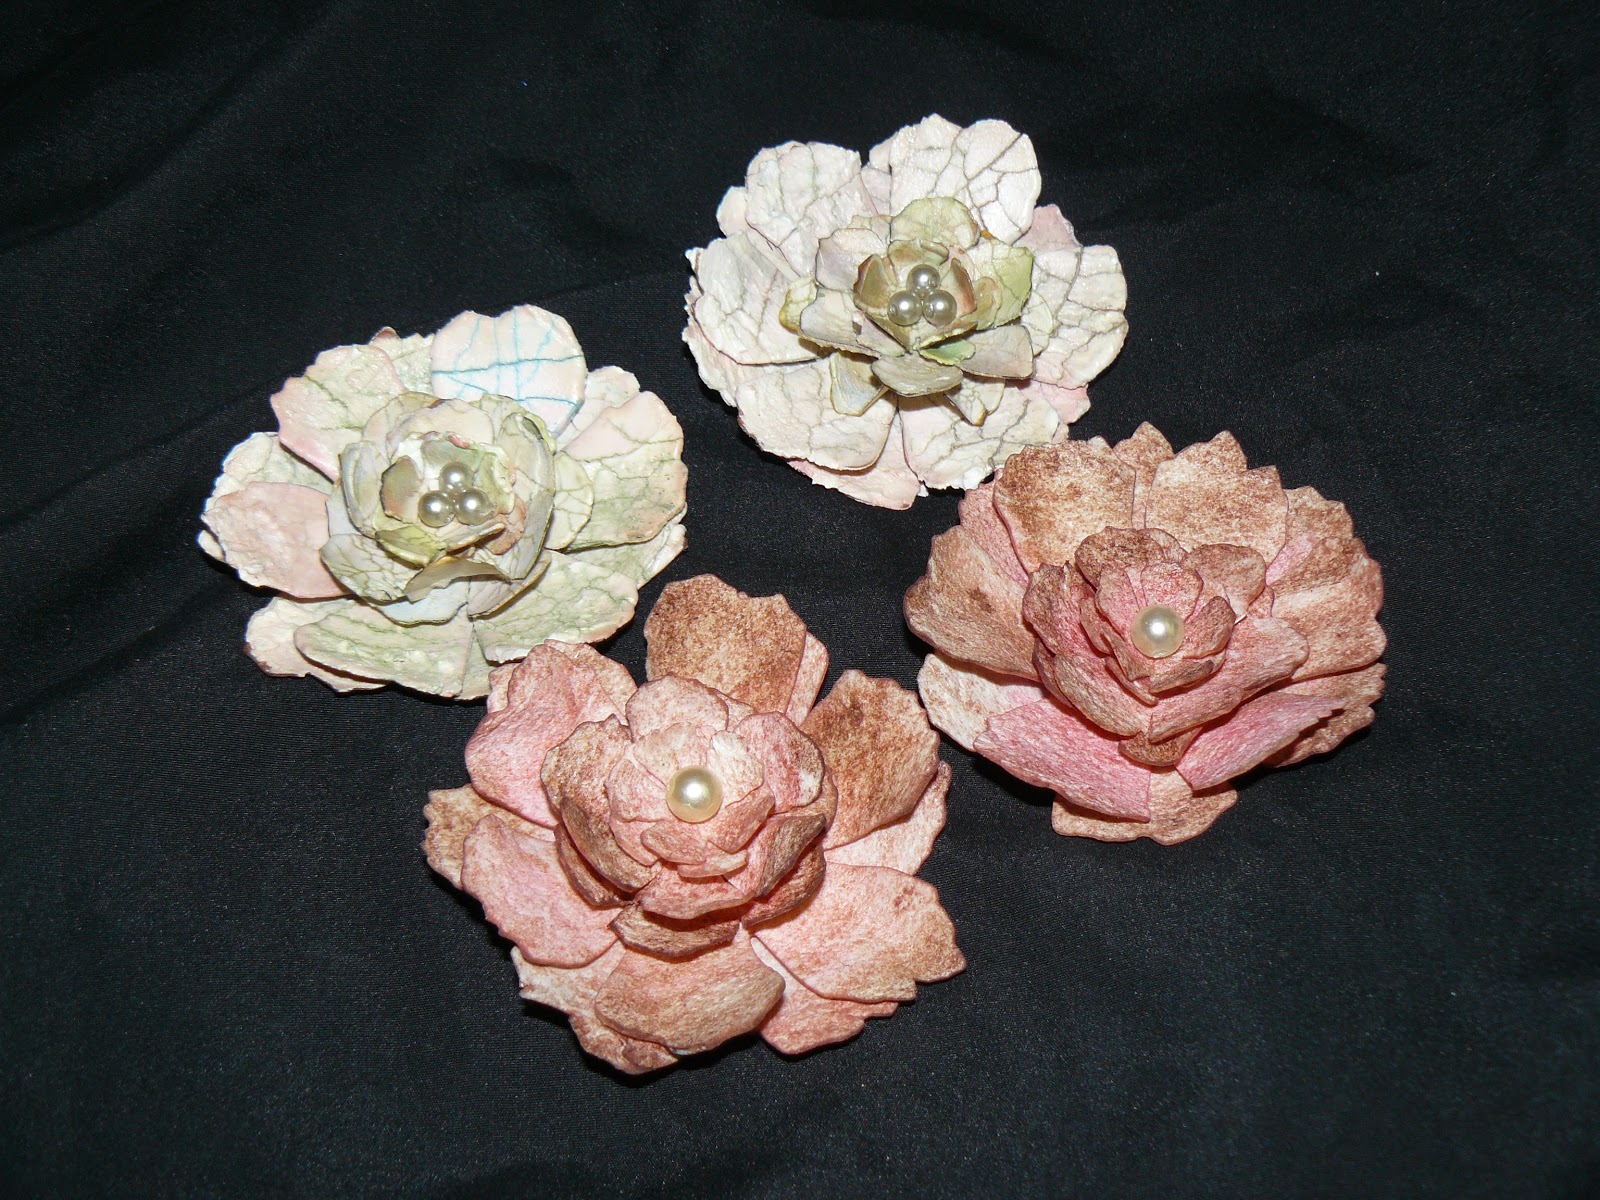
I made two different kinds.  The first was made using Crackle Paste and the other with Fiber Paste.


Crackle Paste Flowers made with Golden Crackle Paste


This flower takes time. I cut the flowers using my tattered floral die out of heavy cardstock.  I used Stampin Up Cardstock because that's what I had on hand. Two each of the large, medium and small flower.  Then I covered it with Golden brand Crackle Paste and let dry over night.  Then I used Tim Holtz distress stain in peeled paint, broken china, vintage photo, and worn lipstick to color them spraying with water to make the colors blend together.  Next I dried them with my heat tool. Then I sprayed them with a matte acrylic sealer to make sure the crackle paste didn't break off. After that I scrunched the petals and shaped them a little to give them shape and then hot glued the layers and added three small pearl beads in the middle to complete the flower.


Fiber Paste Flower made with Golden Fiber Paste


For the Fiber Paste flower I spread a somewhat thin layer of the Golden brand Fiber Paste out on my non stick craft mat and let it dry over night. Using my tattered floral die I cut 2 each of the large, medium and small flower out of the dried fiber paste.  Then I colored the flowers using worn lipstick and vintage photo spraying with water to blend the colors and dried with my heat tool. After that I shaped the flowers and scrunched them up in my hands to give them shape. I then layered them and glued them together with my hot glue gun and topped with a pearl bead.


Wednesday, February 29, 2012

Faux Alligator Purse

I found this Faux alligator purse on you tube and thought it would be a great thing to try.  So I love this video she did a very good job explaining everything!  So first thing I recommend make sure your versamark pad has lots of ink especially if your making more than one at a time. For instructions on the techniques, as well as directions to cut the pattern see the link above it can really show you so much better than I can explain into words! I used passion pink and basic black Stampin Up paper. I used the So Swirly Jumbo Wheel from Stampin Up to make the bottom of the purse using versamark in and embossed it with clear embossing powder. I used the oval punch and the oval scallop punch. I used a stamp from Favorite Teddy Bear. I added a gem for the closure.  For the inside of the card I added whisper white cardstock with the same swirl stamped in black and embossed with clear embossing powder.  Then I added a small piece of velcro to close the purse. I stamped the envelop to match the card.


I also  made a purse gift card holder to go with the card above I made this one out of a coluzzle template that I bought many years ago. I embossed the bottom half with the vintage wallpaper embossing paper folder then I used the So Swirl wheel, versamark ink pad, and black embossing powder on the top. Then top it off with a prima flower and a brad. I used a Making Memories eyelet tool with accessories to make the slits for the gift card inside. Hope you enjoy it all!


Wednesday, February 15, 2012

South Padre Sand Jars

In October my family and I made our first trip to the ocean. It was amazing!  I had never seen anything so beautiful in my life!  While we were there we gathered some amazing seashells and some of the beautiful sand.  When I came home I came up with this great idea to make these jars for my kids to give to their teachers as gifts to share their time and experience at the Gulf Coast.  I got the jars at Hobby Lobby (where I get most of my stuff since thats all we have locally) then I added the sand and placed the shells where I wanted them and added some twine to the top with hot glue. Then I made tags using a spray paint that I've had for a while that looks like sand and some glimmer mist. Here are a couple of pictures of the finished product. :)


Valentine's Card Boxes

I made these boxes for my kids for their class Valentine's Day party.  I got paper mache boxes from Hobby Lobby and covered them with paper studios paper packs also from Hobby Lobby. Then I covered the whole box with modpodge for a glazed look. Then I used some chipboard letters and shapes I got from Target to add their name and some added touches.  For the hearts I used modpodge and clear glaze spray to keep the glitter on the chipboard hearts. I also put some pearl beads along the top of one and sprayed the other handle with tattered angels red glimmer mist.  Here are the pictures of what they looked like when I finished! :)

Tuesday, February 14, 2012

Corset Card!

My Husband and I have been together for 11 years, thats 11 Valentine's Days. So what do you do after that many years together? How about a lacey corset card? Yep, that's what I'll do! I found the idea from Splitcoast Stampers. So then I looked around for a template and found one that I changed a little to fit my needs.  Here's mine, as well as the original one I found
IMG

The one that I found and adjusted can be found here
I loved making this card!  It was so much fun! It's unique and sexy and personal all in one great card! Here's the finished card.


I used the Elegant Lines embossing folder on the front with some red gems, red and black prima flowers, and some white lace with red hearts that I got from Hobby Lobby.

On the inside I added a layer of Paper Studio paper then layered some whisper white on top that was sprayed with some red glimmer mist and stamped with the valentine holiday best stamp from Stampin Up! 

I also made up the envelop with some red glimmer mist and a swirl stamp from Elements of Style from Stampin Up.  The Valentine stamp is from Holiday Best also from Stampin Up. Here's a look at it!


It's a really fun card to make!  You should really give it a try!

Rock Candy IPODS!!!!


I made these amazing candy ipods that I found on the Family Fun site.  I changed the download page though and made this one on Print Shop, then converted it to PDF Format. Here's a copy if you would like to use it.
iPod


I then found this cute heart filled with ipods to use on the back.  Here's the picture of it:


I used it to make the card on the back that said Happy Valentine's Day From ________. Here's what they looked like done.


Again, I used Print Shop and printed them on business cards so that there was no cutting or measuring needed which made it super simple and quick. It was a great fun valentine idea and I got the sweet tart candies at the dallar general for 4 for a $1 so they were not too expensive either. Here's the finished product!

Monday, February 13, 2012

Valentine's Day Wii Remotes


So for Valentine's Day I found these wii remotes that you make out of paper and I thought ummm... that would be cool if I put some candy on the inside.  So then I added some string and made a tag using Print Shop and attach them to the end. So this is what I came up with.


I got the Mario clip art just from Googling it. I love how they turned out and so did my son! :)
Tip: You will need to use terrific tacky tape (red double sided sticky tape) for it to be strong enough to hold the candy. This is very time consuming but also very worth it. A very unique Valentines gift.